 Our friend Paul brought his beloved Martin D-35 in to us for a major overhaul. His guitar was in bad shape: the action was high, the saddle was buried, the frets were completely destroyed, the bridge was pulling up off the soundboard, the binding was coming loose from the fingerboard, and the soundboard was bellied (warped). Paul also wanted to upgrade the nut and saddle from plastic to bone. This was Paul’s first guitar – he bought it brand new at Lundberg’s in Berkeley in 1970. (The money was supposed to go towards his first car he had been saving for, but he bought the guitar instead. We think he made the right choice.) The guitar clearly had some problems, but we’re talking about a 70’s D-35 with a three-piece Indian/Brazillian Rosewood back, Indian Rosewood sides, a Sitka Spruce soundboard and a Honduras Mahogany neck. You can’t buy aged wood like that at Home Depot… It was absolutely worth the overhaul.
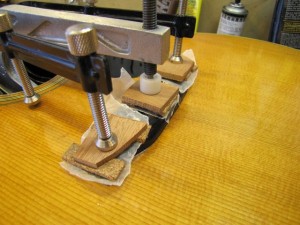
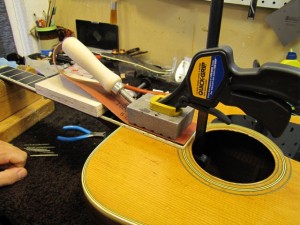 First order of business was to fix the bridge and the soundboard. We removed the bridge and clamped the top with our Thompson Belly Reducer. This is a series of cauls that are concave and convex aluminum. A convex caul matching the bridge footprint is placed on the soundboard and a concave caul matching the footprint of the bridge plate is secured on the bridge plate. These are then heated to 150 degrees and clamped together, sandwiching the bridge plate and the soundboard. The heat and pressure slip the glue joint between the bridge plate and the soundboard. The convex and concave cauls worked to push the belly out of the soundboard. When the glue joint cools, the bellying dimishes.
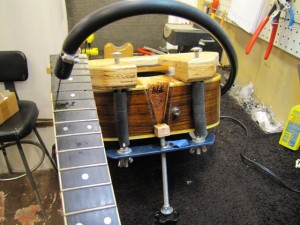
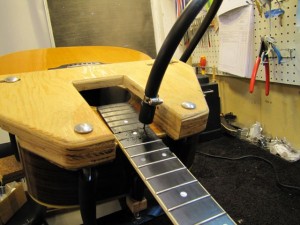 Paul’s neck had pulled up over the years, which caused the action to be very high. This is a commong problem with older acoustic guitars, and to fix this common problem, the neck must be re-set. This involves removing the neck and shaving wood from the heel, increasing the neck angle. This will allow a new saddle of proper height to be fitted in the bridge. We will be able to bring the action down, improve resonance, increase projection, and help prevent bellying of the soundboard. First, we separate the tongue of the fingerboard from the soundboard by heating the fretboard and melting the glue. Next, we remove the 14th fret, which is above the backside of the dovetail joint that secures the neck to the neck block. Drilling two .080″ holes in the fret slot on either side of the dovetail enables us to inject a steam needle into the joint. This is attached to our super secret special steaming tool (ok, it’s an espresso machine), we then put the guitar in our neck removal jig. This secures the guitar body and has a threaded screw with a cap that pushes on the bottom of the heel. When the steam penetrates the joint and the glue become malleable the threaded screw is turned applying pressure to the neck, pushing it out of the neck block.
 The next step is to clean up all excess glue from both the neck block and the dovetail on the heel. After that, wood is shaved from the bottom of the heel gradually tapering towards the fretboard joint. This is a time consuming process that requires extreme precision, and nobody is better at it than our man Spencer Maki. There are far too many steps to this procedure to detail here but let’s just say that it requires the use of tons of sandpaper, razor sharp chisels, and lots and lots of squinting eyeballs. The basic gist of the process is this: re-cut the sides of the heel to increase the neck angle such that the plane of the fingerboard hits the top of the middle of the bridge. On a guitar that needs to have the neck re-set, the plane of the fingerboard falls below the top of the bridge, causing high action. Once the heel is properly shaved we fit the dovetail with shims, coat the joint and tongue with hide glue, clamp, and wait for it to dry.
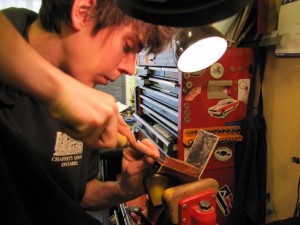 Paul had worn down the frets to the point of no return over the last 40 years, so they needed to be replaced. The frets are carefully heated with a soldering gun, melting any old glue and releasing natural oils in the wood. Then fret pullers are worked under the bottom of the fret wire, gently rocking the fret while lifting. Then we set the guitar on our neck jig (which simulates tension on the neck without the strings on it), and trued the fretboard with a leveling beam. We then trued the radius with our 24″ long aluminum radius beam. Once the fingerboard was perfect, we installed new frets, matching the original vintage size fretwire. Paul’s guitar neck has binding, so we needed to undercut the fret tang to clear the binding. The tang is the part of the fret with small teeth that seat it into the fingerboard. After flowing hide glue into the fret slots, the frets were pressed in with our fretting caul. Then it’s back to the neck jig for a level and dress, and then the final setup.
And we’re done! The guitar came out great, and most important – Paul loves it! Here’s what Paul had to say about it: “It’s as if my guitars came out of a coma… I now have a 40 year old guitar that plays better then it did in 1969, has the deep rich tone that D 35’s should have with a shimmer overtone that gives me chills. You would be jealous.”

Thanks Paul!
This Post Has 7 Comments
Leave a Reply
You must be logged in to post a comment.


I also have a 1970 Martin D-35 , I’m the original owner , bought it after my rock band broke up in 1970….tried out every D-35 the store had & bought the one I thought sounded best. In the early 90’s I brought it back to Martin to correct bad intonation & they replaced the bridge with a slightly oversized one….problem solved…also at that time Martin fixed some loose frets , and some people in upper management said it was one a the best sounding D-35’s they have ever heard. The guitar still plays great , set up with low action , mint condition & no need for a reset. You can find early 70’s D-35’s but you have to go thru a lot of them…only 1 out a 10 are really awesome sounding.
Hi Dan, please take some photos and e-mail them to us over at “[email protected]” and we can give you an idea after seeing the photos.
I read with interest the article on Pauls D-35. I also have a 70-71 D-35 that has need of some restorative care. I realize each case is different based upon the needs of the particular instrument, but I was hoping you could give me some range of cost for instruments of this era. My intent is to bring it in one day for an actual inspection, but some sense of what cost are involved would help
Interestingly my 1971 D35 also had a slight bellying problem but that was resolved by shaving the bridge which lowered the action back to what it should be. The work was done by the UK luthier who did Martin’s warranty work at the time. He also did a partial refret. I have heard that 35s are prone to bellying – especially as the original strings specified were 13s, and the top braccing is lighter than the D28.
I’m surprised that a 69 has a ‘mush’in the bass. There are lots of discussions that say that a 35 has a heavier bass than a 28 but I remember correspondence with Mike Longworth at Martin who admitted that in general he couldn’t hear a difference between the 35 and 28 when I said that a friend’s 28 had a better treble response.
Mind you I’ve been trying various Martins in specialist shoips and have to admit I think I got an exceptional one. The guy who did the repair said the same thing too. It’s a great rhythm and flat picking guitar and plays well finger style too, although one day I’ll buy a OOO 28 to go along side it!
Hi Jeff,
It’s certainly possible that changing the bridge plate can change the tone of the guitar, but there’s no guarantee that it will be a desirous change. We like to say “everything is everything” around here – meaning that every part of the guitar contributes to the whole of the tone, but changing one aspect doesn’t necessarily correlate to any significant change.
I recently bought a ’69 Brazilian D-35 and was wondering if you recommend changing the large rosewood bridge-plate to a small maple one? Would this change make some of the “mush” go away in the bass of the guitar? Would it improve the projection of the guitar? Thanks in advance. Jeff
I just bought a 1971 D-35 and had it similarly redone. Bone nut and bridge; new bridge plate; new fingerboard; new binding; new finish. It was taken apart completely to replace the bracing which someone had tried to carve down and failed, causing the top to cave in. Thew neck was re-set. It was playable but rough. High action, deep grooves between frets. The binding was coming off in places.
Now it is like brand new. Sound is warm and wonderful. ONly down side is now I don’t like to take it places where I think it my get harmed. I worry about scratches, etc.